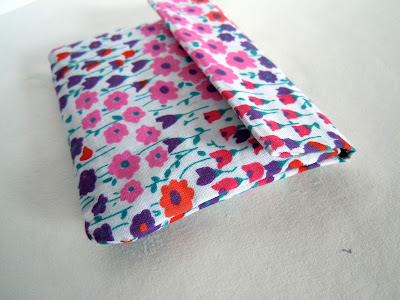
I've made a few duct tape wallets for Alex in the past, and although they're cool, they can be kinda scruffy. So, through a lot of trial and error, I recently devised my own way to make more girly purses using duct tape and pretty fabric. I'm so excited to show you this, especially after the ORDEAL to get it all uploaded!
This DIY can be adjusted to make a clutch bag, makeup bag, business card holder... Just increase or trim down the size accordingly.
You will need: Fabric, duct tape, stapler, scissors, paper (optional), adhesive Velcro (optional).
Time taken: 20 minutes
Cost per purse: No more than £1! (Considering setting up an Etsy right now!)
Watch the video tutorial here, or scroll down for step by step pics.
(Excuse my almost drunken babbling at the start of the vid. Couldn't get my words out after a gruelling day at work!!) Skip to 1:39 to cut to the chase if you'd like to be spared the wittering!
Step 1 - Make a paper template of the size/length you'll want your purse to be. Leave a little extra seam allowance.
Step 2 - On the reverse of your fabric, start sticking strips of Duct Tape down. Have each new strip overlap the other by about a third until you've done enough.
Step 3 - Trace round your paper template with a pen (or if you've used black tape, pressing hard with a pen/pencil leaves a visible enough imprint). Follow the lines and snip!
Step 4 - You are here:
Step 5 - Fold one end over slightly and tape in place as shown. This bit will be the opening of your purse so needs to be hemmed.
Step 6 - Fold the material as shown, adjusting to however big you want the boy of your purse to be. Staple down the sides, keeping each staple close together and as straight as poss!
Step 7 - You are here:
Step 8 - Make a little snip in the circled area, cutting in as far as your row of staples are. (See vid if this is unclear). Repeat on the other side
Step 9 - Turn the purse over and fold the material you've just snipped on each side, securing with duct tape.
Step 10 - Cover the stapled sides of your purse tightly with duct tape to maximise durability.
Step 11 - Put said durability to the test and (gently) wrestle that baby inside out! Now decide how far you want the top of the purse to fold over, leaving half a centimetre for hemming it. Trim if required, then hem as shown in steps 5 and 9.
Step 12 - Fasten the purse with some adhesive velcro, available for about £1.50 per half meter from C&H fabrics (or curtain shops, as I discovered this morning!) Cutting wonky velcro heart shapes, optional!
Step 13 - Leave plain or decorate as you wish! Gluing on some gems or a button could look cute!
FIN!
I hope you've enjoyed this tip. If I've forgotten anything or you have any questions, just comment or tweet! Let me know if you decide to make it! It's a proper rainy day DIY so I'm secretly hoping for some April showers...
♥


0 comments:
Post a Comment